
1. How to get the Cronet compilation package
- Source code compilation
You can refer to Google ‘s official guide to compile. But the compilation process is very bumpy, and you will encounter a lot of errors along the way. It is not recommended to use this method
- Use the compiled
Google Cloud
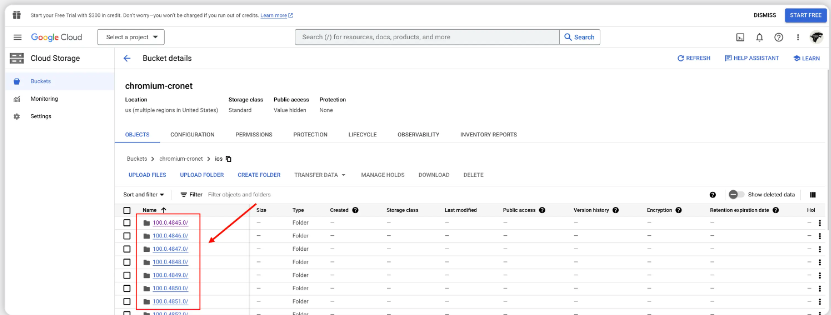
Google provides compiled packages in Google Cloud . The compilation cycle is very short, and there are new packages basically every day. Just select the specified version number to download.
gsutil
Downloading requires the gsutil tool, which can be installed through the following method
pip3 install gsutil
Choose the right version
By browsing the version record, the latest version is 116.0.5820.0 compiled on 2023.6.8
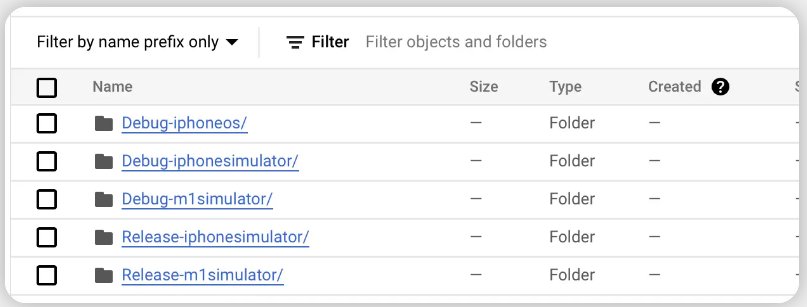
Needless to say, Debug cannot be used online.
- Release-iphonesimultor: intel chip x86_64 simulator package
- Release-m1 simulator: M1 chip simulator + real machine packageIt is not recommended to use this package. Currently, some students in the company are using Intel chips for development. If you use a package containing M1 chips, the project will not be compiled successfully.
Continuing to search further, we found 114.0.5735.140 compiled on 2023.6.16
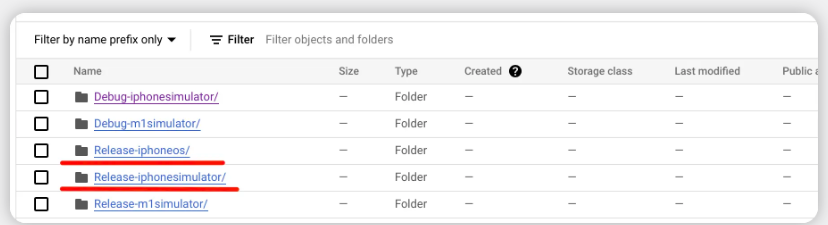
- Release-iphonesimultor: intel chip x86_64 simulator package
- Release-iphoneos: real phone package
The above two Release version packages are exactly what we need.
Download package
We use the gsutil tool to download the 114.0.5735.140 version package. Execute the following command in the terminal
gsutil -m cp -r \
  "gs://chromium-cronet/ios/114.0.5735.140/Debug-iphonesimulator" \
  "gs://chromium-cronet/ios/114.0.5735.140/Debug-m1simulator" \
  "gs://chromium-cronet/ios/114.0.5735.140/Release-iphoneos" \
  "gs://chromium-cronet/ios/114.0.5735.140/Release-iphonesimulator" \
  "gs://chromium-cronet/ios/114.0.5735.140/Release-m1simulator" \
  .
merge package
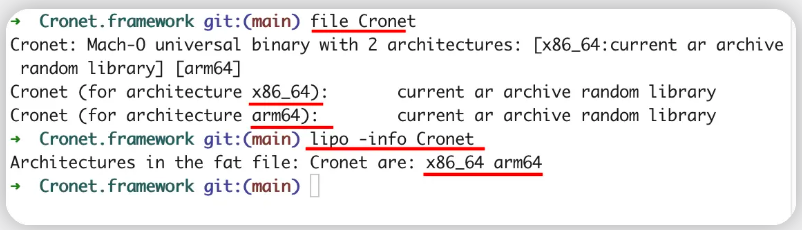
Use the lipo command to merge the two packages Release-iphonesimulator and Release-iphoneos into a package that contains both arm64and x86_64. You can use static packages or dynamic packages.
lipo -create xxxx yyy -output Cronet
After merging, view the structure of the package through filethe or commandlipo -info
2. How to integrate
Create a new project and add Cronet.framework to the project. In order to successfully compile and run, you need to add some dependent system libraries to the project.

Github open source demo: github.com/lyandy/ios_…
3. API Practice
Cronet uses NSURLProtocol aspect programming to intercept network requests from the iOS system, and it is relatively easy to integrate.
Set up Cronet
//
    [Cronet setHttp2Enabled:YES];
    //
    [Cronet setQuicEnabled:YES];
    //
    [Cronet setBrotliEnabled:YES];
    //
//    [Cronet setAcceptLanguages:@"en-US,en"];

    //
    //
    // [Cronet setUserAgent:@"Dummy/1.0" partial:NO];

    //
//    [Cronet setHttpCacheType:CRNHttpCacheTypeDisabled];

    //
    [Cronet setMetricsEnabled:YES];

    //
    [Cronet addQuicHint:@"h2o.examp1e.net" port:443 altPort:443];

    //
    [Cronet start];

    //
    //
//    [Cronet registerHttpProtocolHandler];

    //
    //
    [Cronet setRequestFilterBlock:^BOOL(NSURLRequest* request) {
        return YES;
    }];
hook network request
The following is the simplest example
- (void)startNSURLSession {
    NSURLSessionConfiguration *config = [NSURLSessionConfiguration defaultSessionConfiguration];
    [Cronet installIntoSessionConfiguration:config]; // hook Protocol
    NSURLSession *session = [NSURLSession sessionWithConfiguration:config delegate:self delegateQueue:[NSOperationQueue mainQueue]];
    NSMutableURLRequest *request = [NSMutableURLRequest requestWithURL:[NSURL URLWithString:[@"https://h2o.examp1e.net?t=" stringByAppendingString:@([[NSDate date] timeIntervalSince1970]).stringValue]]];
    request.assumesHTTP3Capable = NO; // 关闭Apple QUIC
    NSURLSessionDataTask *task = [self.session dataTaskWithRequest:request completionHandler:^(NSData *data, NSURLResponse *resp, __unused NSError *err) {
        NSLog(@"");
    }];

    [task resume];
}
4. Test
Check whether Cronet is effective through Charles packet capture and Wireshark network layer packet capture.
(The following demonstration results are all experimental results using Github open source demo: github.com/lyandy/ios_… )
Observation link: h2o.examp1e.net?t=xxx (This link is supported H3, xxx is the timestamp to prevent LocalNetwork from appearing, and H3 is automatically downgraded to H2)
Charles
In order to observe the effect, we deliberately set Cronet User-AgenttoDummy/1.0
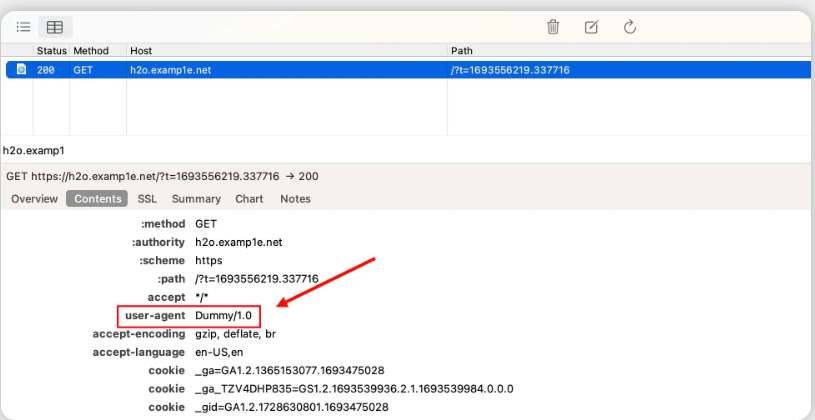
Observed User-Agentas Dummy/1.0, indicating that Cronet intercepted the request successfully
Wireshark
In order to avoid interference from Apple itself QUIC, we deliberately QUICshut down Apple
request.assumesHTTP3Capable = NO;
Through Wireshark’s filtering rules, we filter out the IP addresses of the local Mac and h2o.examp1e.net
(ip.src==132.226.1.140 and ip.dst==10.6.0.107 ) or (ip.src==10.6.0.107 and ip.dst== 132.226.1.140)
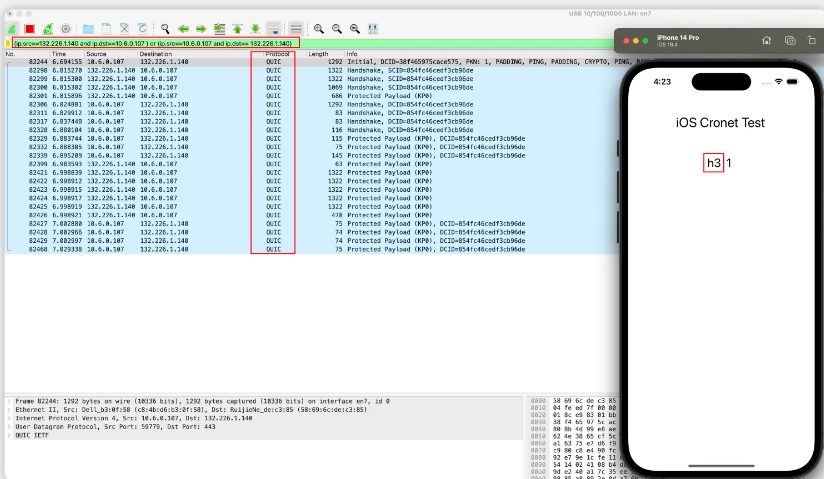
You can see that the Protocol is QUIC, and the recognized Protocol is also displayed in the demo.H3
After waiting for a while and issuing the same request again, we can easily observe 0-RTTthe phenomenon, which is very useful for speeding up network transmission.
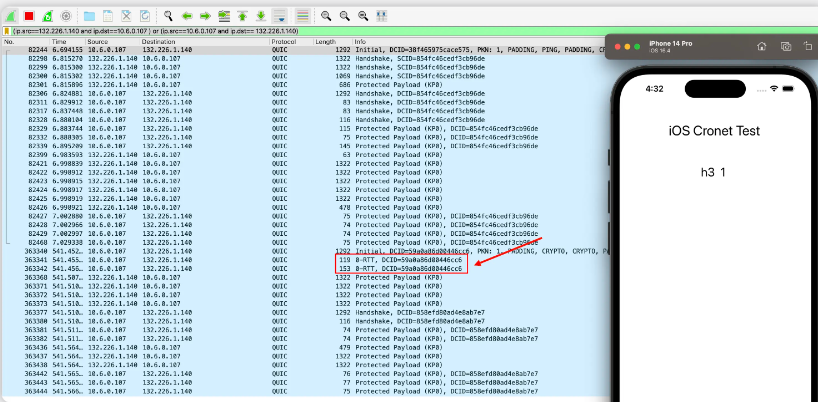
Through the above tests, it can be concluded that the integrated Cronet works normally and H3uses QUICthe protocol for supported requests.
5. Other discussions
Apple’s NSURLSession itself has many benefits and can be automatically supported without developer involvement. Is Cronet the same? as follows
| NSURLSession | Cronet | |
|---|---|---|
| QUIC | ✅ | ✅ |
| IPv6 | ✅ | ✅ |
| TCP Fast Open | ✅ | ✅ |
| TLS 1.3 | ✅ | ✅ |
| MultipathTCP | ✅ | ✅ |
| minimumiOS | iOS 14.5 | iOS 10 |
The use of Cronet is still under exploration. If there are any errors, please point them out and discuss them together.