
There are two ways to create a springboot project:
1. Don’t use shortcuts
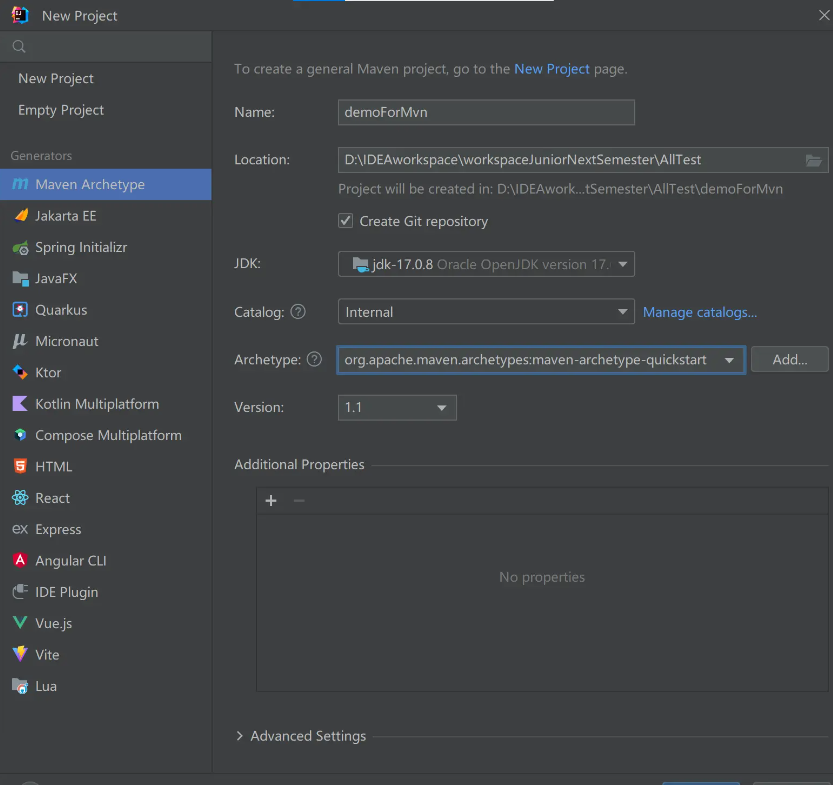
Create a maven project, as shown in the figure:
The Catalog selects internal, which is to find plug-ins in the local warehouse to quickly create projects. Archetype selects the one ending with quickstart
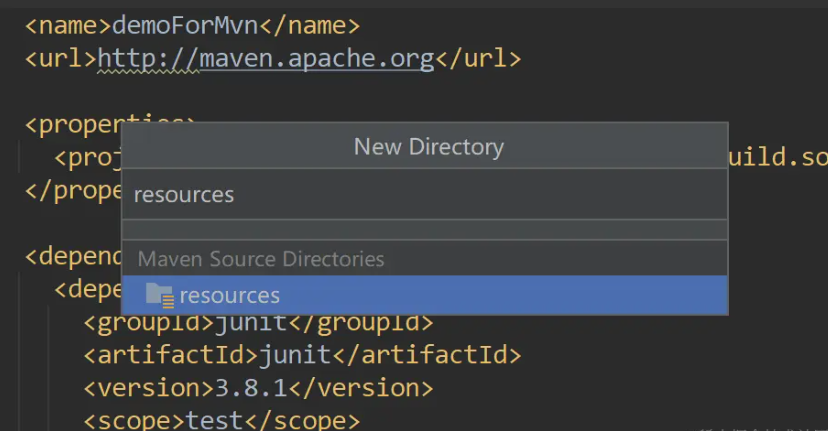
The directory structure of the created project is as follows. It may be a problem with the IDE version. There is no resources directory under the src/main package I created. If you created it, there is no resources directory.
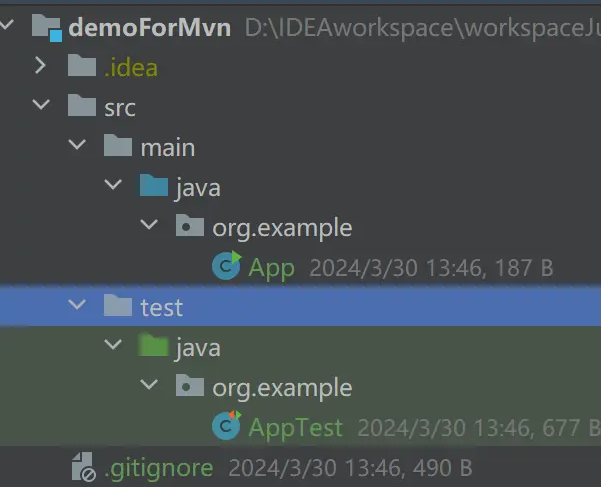
Just right-click main and select new ==>Directory, and the resources prompt will appear. Just add it yourself, and then we can start building a springboot project
1. Add the spring-boot-starter-parent item in the pom.xml file, not dependency, but outside dependencies
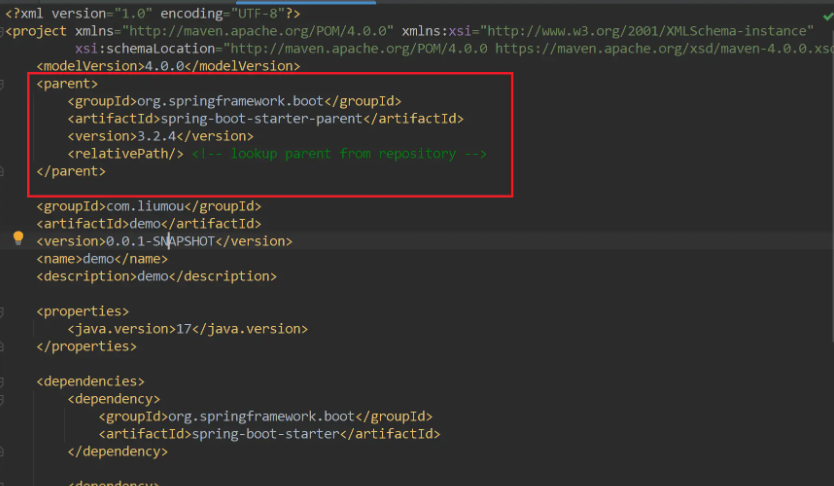
2. Add the spring-boot-starter dependency. If you need to use the springboot environment in the test class, you can also introduce the spring-boot-starter-test dependency. If you want to write a controller, introduce the spring-boot-starter-web dependency. At the same time, there is no need to introduce the first dependency, because the web dependency contains spring-boot-starter. I have introduced all these
<!---->
<dependency>
    <groupId>org.springframework.boot</groupId>
    <artifactId>spring-boot-starter</artifactId>
</dependency>

<dependency>
    <groupId>org.springframework.boot</groupId>
    <artifactId>spring-boot-starter-test</artifactId>
</dependency>
<dependency>
    <groupId>org.springframework.boot</groupId>
    <artifactId>spring-boot-starter-web</artifactId>
</dependency>
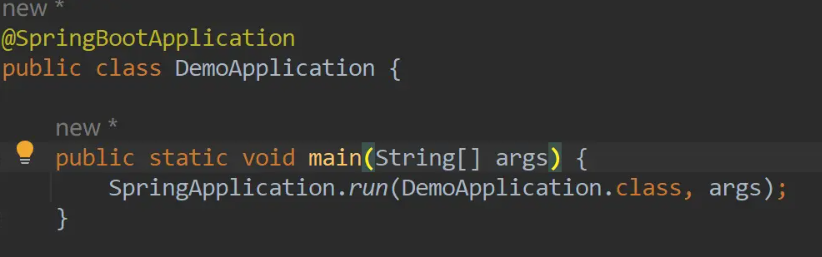
3. Modify the startup class, add the @SpringBootApplication annotation, and call the SpringApplication.run() method.
@SpringBootApplication
public class App {
    public static void main( String[] args ) {
        SpringApplication.run(App.class,args);
    }
}
4.Add plugins
 <build>
        <plugins>
            <plugin>
                <groupId>org.springframework.boot</groupId>
                <artifactId>spring-boot-maven-plugin</artifactId>
            </plugin>
        </plugins>
    </build>
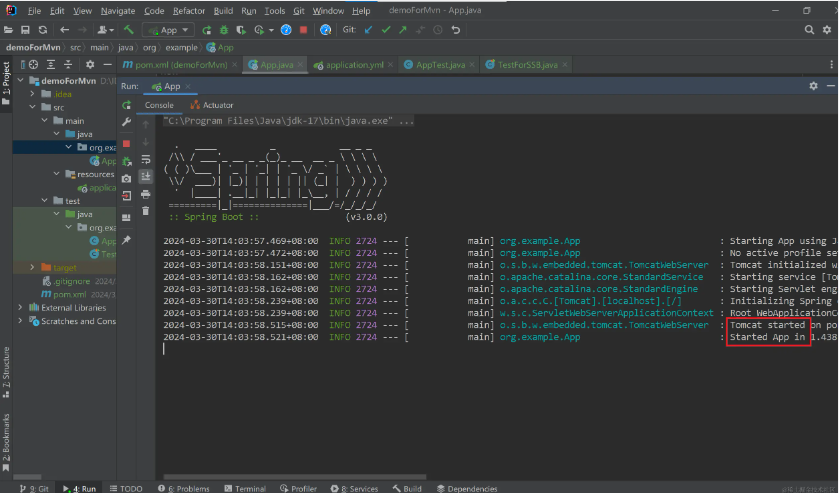
Finally, just start the project. You can see that the project started successfully and tomcat also started successfully.
2. Use shortcuts
2.1 Use the Spring initiaizr that comes with the IDE
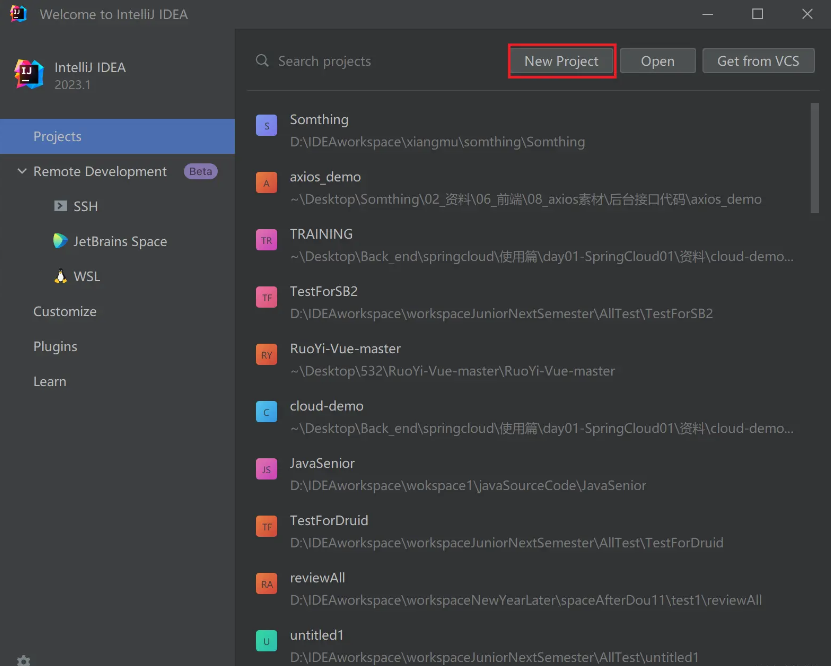
new Project
Don’t forget to select maven for type
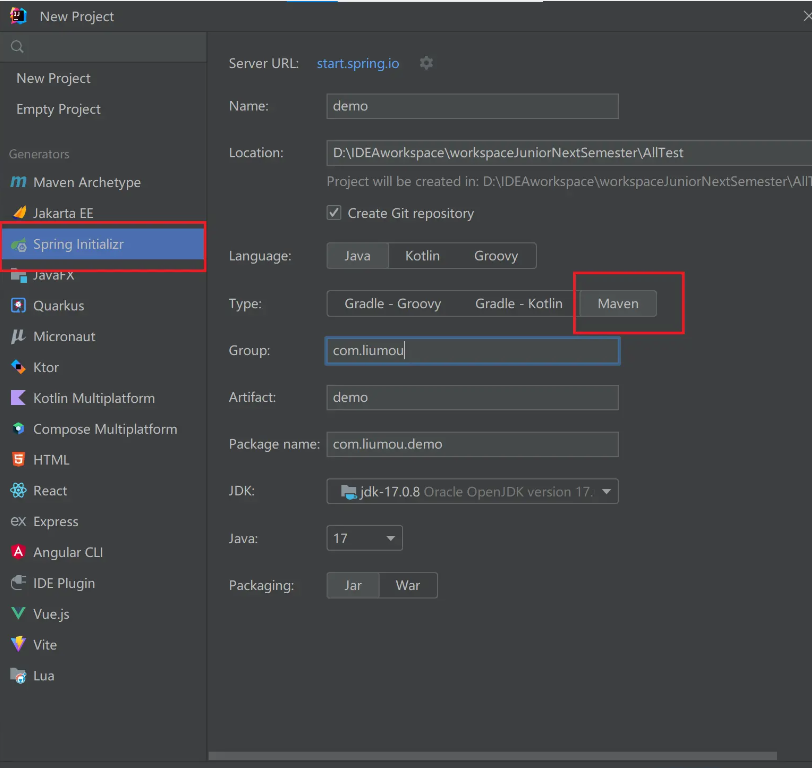
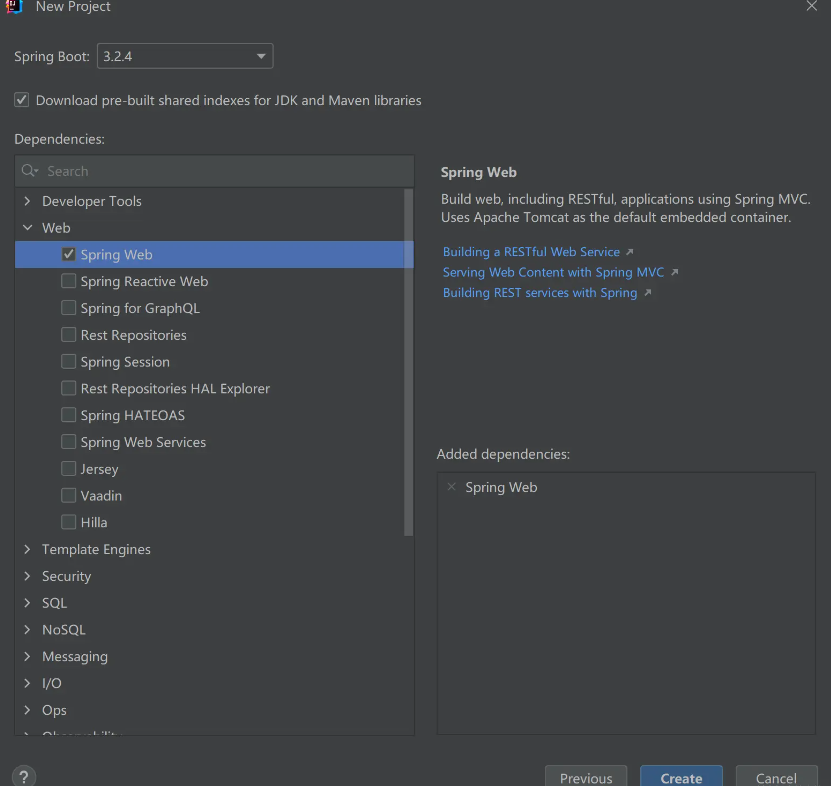
Here you need to select the required dependencies in advance, and the IDE will automatically import the selected dependencies. You can select nothing, in which case you can introduce whatever dependencies you need later. For example, I select the web item here
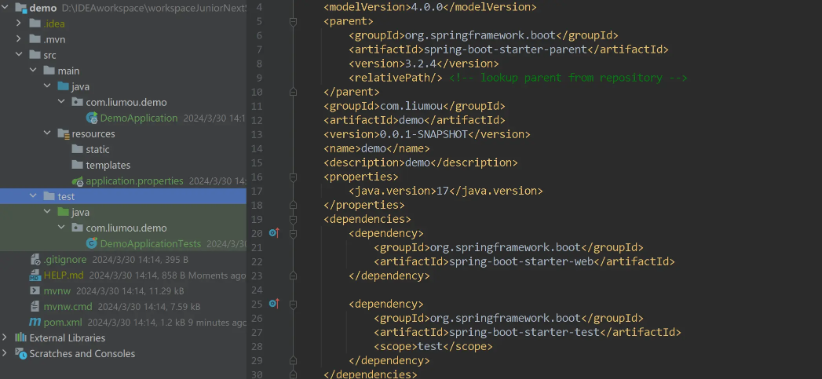
After create, it is actually similar to what was built using the maven project above.
2.2 Use Spring Initiaizr from the official website
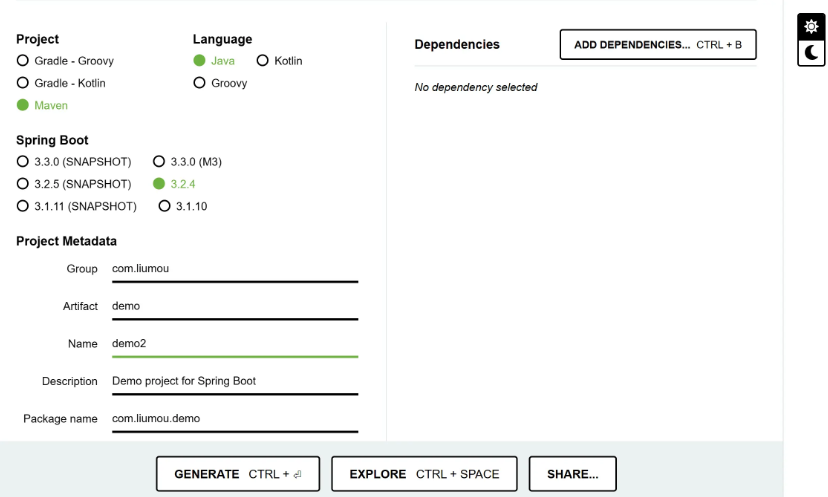
Then click GENERATE below, and we will get a compressed package
After decompressing, import it in the ide, fiel->New->Project from Existing Sources
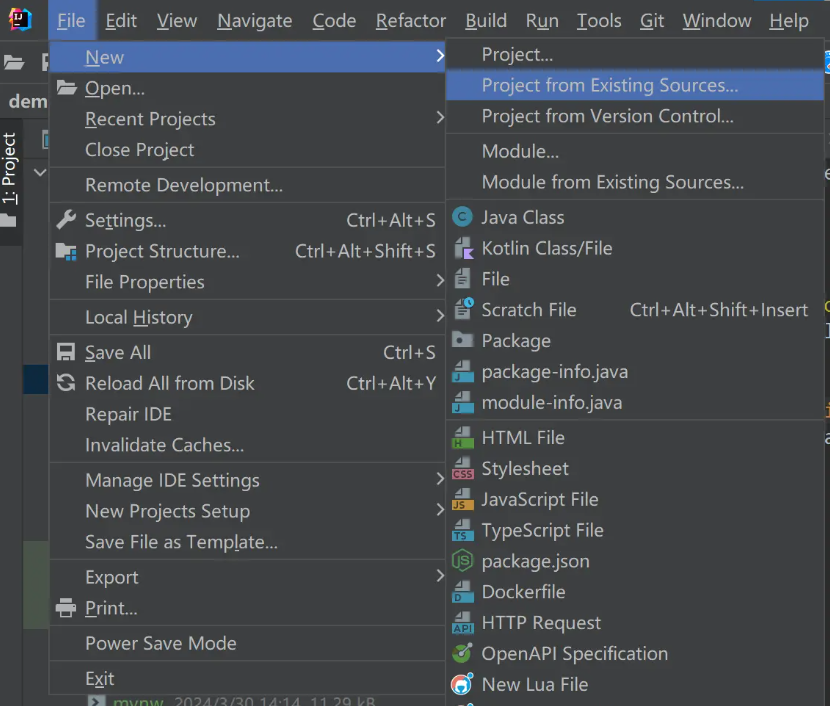
Then select the unzipped project.