Preface
I know basically nothing about Android reverse engineering, which is why this column was created.
Why start the column with Frida? the reason is simple:
- The author recently used Frida and learned a lot of knowledge, which I urgently need to record.
- Frida itself is very good and is almost a standard tool for reverse engineering experts.
- I have always adhered to the idea of ”learning new technologies through practice”, and Frida is also a relatively easy-to-use training tool.
Therefore, I have also added some Frida-related exercises to this article, and the steps are very detailed.
Believe me, after reading this article in 10 minutes, you will get started with Frida and give you the confidence to use Frida.
1. Introduction to Frida
It is obviously irrational to just use Frida without knowing what it is. So what is Frida? Let’s take a look at the introduction to the github documentation :

In addition, on its website , the following four features are also introduced

OK, let’s describe it in one sentence: Frida is a “scriptable, portable, free and very popular” dynamic instrumentation tool .
For those who know what instrumentation means, there is no need to explain too much. And if you don’t know what instrumentation means, I can give you a rough introduction. You can understand it as: inserting your code somewhere in the source program, and finally executing it together without “having to change the code of the source program . “
It doesn’t matter if you don’t understand it, just ignore it and it won’t affect the following content.
2. Frida environment configuration
Above we introduced what Frida is, and by the way introduced the meaning of instrumentation. Let’s go straight to the topic and start using Frida.
First, let’s configure the environment.
Regarding Frida’s environment, you need to know that if you are a mobile developer and want to reversely move your app, in addition to installing Frida-related toolkits on your computer, you must also install Frida-related toolkits on your mobile phone .
Below, we first introduce the installation method on the computer, and then the installation method on the mobile phone.
1. Install Frida on your computer
Computer installation is very simple, just three lines of code.
pip install frida-tools # CLI tools
pip install frida       # Python bindings
npm install frida       # Node.js bindings
Just execute it all without thinking and make sure there are no problems in all environments. After installation, it is available
frida — version
Check the version of frida and verify whether the installation is successful.
2. Install Frida on your mobile phone
Installation on mobile phones is a little more complicated.
First of all, you need to know that the mobile phone does not install Frida, but the frida server. The two are different.
At the same time, the mobile phone needs to be rooted (of course, it is also possible to have a non-rooted one, and you need to use frida-gadget. I have not tried it, but I recommend that everyone install a rooted mobile phone to save all kinds of trouble later)
After you have a rooted phone, start the following steps
(1) Download frida server
After the mobile phone and computer are connected through adb, execute
adb shell getprop ro.product.cpu.abi
To check the phone model, then find the matching package in the download list to download. For example: My phone is arm64-v8a, then I should download it.

Note that we downloaded frida-server, don’t download it by mistake. I downloaded the wrong package before, which caused problems later. The problem link: github.com/frida/frida…
(2) Copy frida server to Android phone
After downloading, its name is: frida-server-16.2.1-android-arm64, which can be renamed: frida-server to facilitate command input.
Then, use the adb command to push frida-server to Android’s temporary file. For example, if frida-server is on your desktop at this time, you can use
adb push /Users/username/Desktop/frida-sever /data/local/tmp
Push frida-server to Android’s temporary file
(3) Change the permissions of the frida-server file
Use Unix command:
chmod 755 /data/local/tmp/frida-server
Change the permissions of frida-server
Explanation of this command:
- chmod is the abbreviation of “change mode” and is used to modify the permissions of files or directories.
- 755 is the permission setting. It is divided into three groups of numbers, each group of numbers represents the permissions of a user category (owner, group, other users). Each set of numbers is the sum of three binary digits, which represent read (4), write (2), and execute (1) permissions respectively. Therefore,
7(i.e. 4+2+1) means having read, write and execute permissions,5(i.e. 4+1) means having read and execute permissions but no write permissions.So,
chmod 755 /data/local/tmp/frida-serverwhat it means is: set permissions for/data/local/tmp/frida-serverthe file so that the owner of the file can read, write, and execute the file, and the group user and other users of the file can only read and execute the file to ensure thatfrida-serverthere are correct permissions on the Android device. Execute permissions so we can run it for dynamic code instrumentation and debugging.
(4) Forwarding port
Very simple, two lines of command
adb forward tcp:27042 tcp:27042

//
adb forward tcp:27043 tcp:27043
Explanation:
tcp:27042Usuallyfrida-serverthe default port for listening. Execute this command to enable the Frida client to connect to the devicefrida-server.
(5) Run frida-server
Launch it on your Android device via ADB frida-serverand leave it running in the background
adb shell “/data/local/tmp/frida-server &”
(6) Verification
implement
frida-ps -U
The command can output the pid and name of all processes currently running on the phone.

If the output is normal, it means everything is ok and all the preparatory work is completed.
3. Some problems that may exist during the period and their solutions (please add them at any time):
- Failed to spawn: need Gadget to attach on jailed Android
- Solution link: github.com/frida/frida…
- cannot import name ‘NotRequired’ from ‘typing_extensions’
- Solution link: blog.csdn.net/qq127816970…
- Android Frida ProcessNotFoundError error when trying to attach to a process
- Solution link: stackoverflow.com/questions/7…
3. Actual combat
Let’s use an Android Demo to demonstrate how to use Frida for instrumentation.
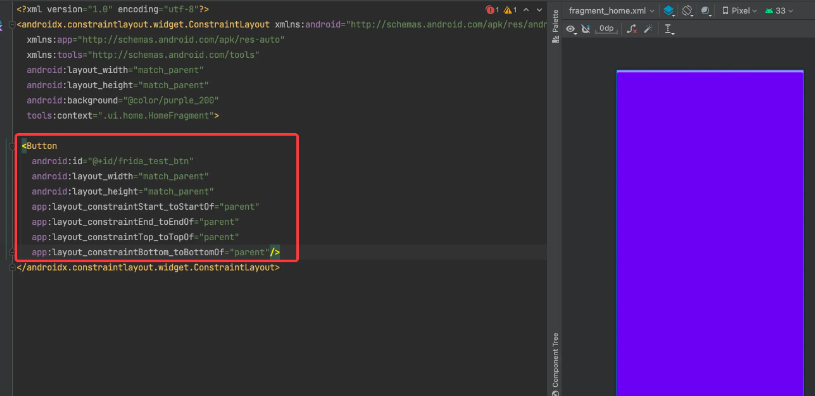
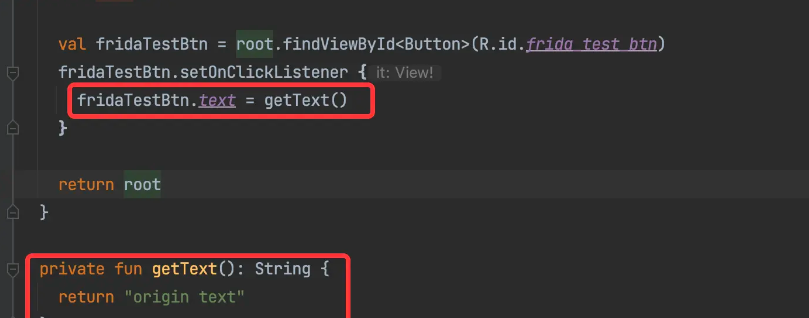
First, we create a new Android project with the following code


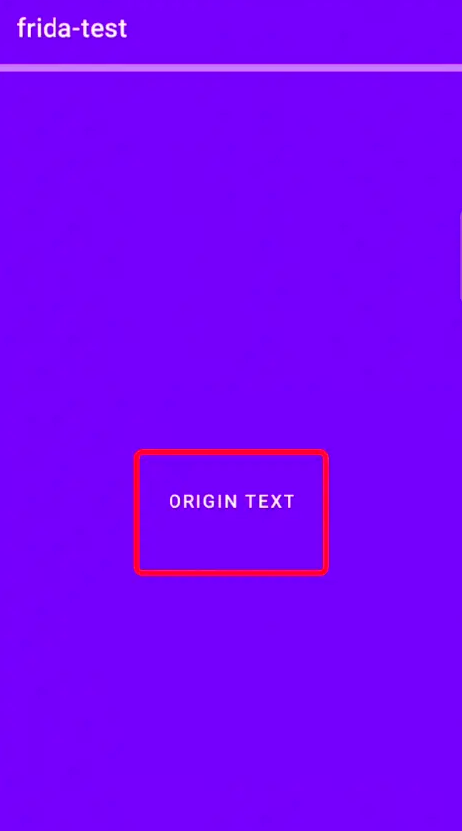
After clicking, the effect is:

This code is very simple, I won’t explain it.
At this point, we want to hijack getTextthe method and make it return the value we want it to return. What should we do?
You need a Python script, give the code directly, you can understand it at a glance
import frida  #
import sys    #


jscode = """
    Java.perform(function() {
        var homeFragment = Java.use("com.example.fridaTest.ui.home.HomeFragment")
        homeFragment.getText.implementation = function() {
            send('inter fun'); //
            return 'hook success!!!'
        }
    });
"""

def on_message(message,data): #
    print(message)

package_name = "com.example.fridaTest"
device = frida.get_usb_device()
pid = None
for a in device.enumerate_applications():
    # print(a)
    if a.identifier == package_name:
        pid = a.pid
        break
#
process = device.attach(pid)
script = process.create_script(jscode) #
script.load() #
sys.stdin.read(
explain:
After writing, save it, and then open the app you want to hook. Then, execute the python code
python /Users/username/Desktop/fridaTester.py
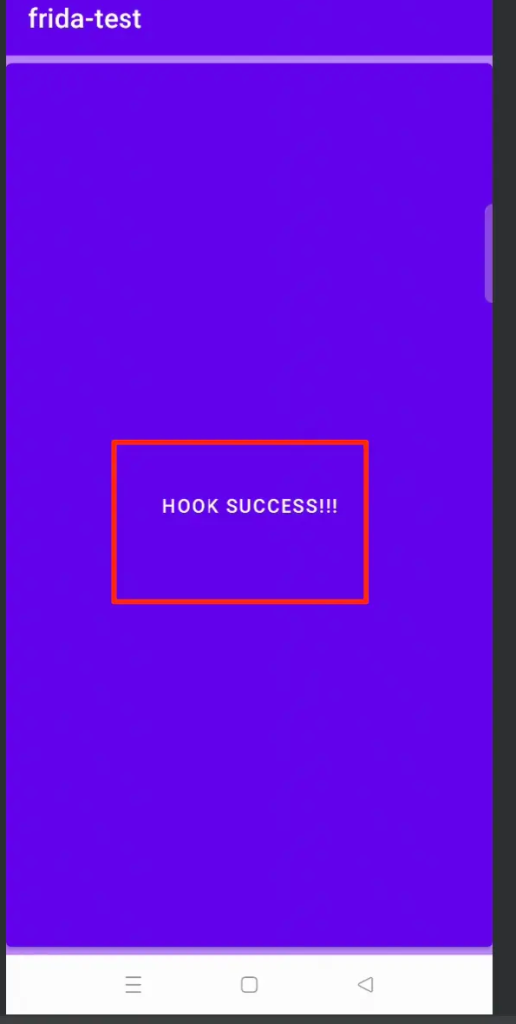
After execution, click the App button and print it in the terminal.

At the same time, the copy of the App button has also become the copy inserted by our hook.

In this way, it runs through.
Extra meal: jadx
Sometimes, we want to hook an application, but we don’t know what classes are in the application. What should we do?
Answer: jadx tool
what is jadx
In the official documentation , it is introduced that: jadx is a Dex to Java decompiler. It can be executed through the command line or through the UI interface. It is used to generate Java source code from Android Dex and Apk files.
What does that mean?
That is: you give this tool an apk package, and it can directly decompile it into source code for you .
For example, the program I just did did not do any obfuscation. I directly threw base.apk into jadx, and the result is as shown in the figure
So this tool can solve the problem raised at the beginning of this section. But I won’t introduce the installation and use of this tool in detail here.
Summarize
This article mainly introduces the environment construction and basic use of Frida. There are no complicated or advanced techniques, but I believe it is enough for you to get started with Frida.
Thank you for reading!

