

Fine-Tuning, that is, fine-tuning. I try to use my understanding to describe the meaning of fine-tuning: on the basis of the original model, by supplementing some data, using these supplementary data to train the original model, the training process adjusts some parameters of the original model, so that Models can perform better in certain scenarios.
Therefore, fine-tuning a large model can improve its performance in specific scenarios, but at the same time, it will reduce the ability of the large model in general scenarios.
Today, we will start with a simple example to get a feel for what Fine-Tune fine-tuning is. This example can be run on a laptop and does not require high configuration. You may not know anything about model training before starting the practical case in this article. This article will take you through the entire process while explaining some of the concepts.
0. Environment preparation
Use huggingface, a model training tool, for model training and fine-tuning. Execute the following code to install:
#
pip install transformers #
#
conda install -c huggingface transformers  #
Introduction to huggingface:
- Equivalent to Github for NLP models
- In particular, the open source model based on transformer is very comprehensive.
- It encapsulates models, data sets, trainers, etc., making it very convenient to download, use, and train the model.
1. Load the training data set
Here you can directly use the functions datasetsin the library load_datasetfor online loading. You only need to specify the name of the data set in HuggingFace.
This article takes the rotten_tomatoes data set as an example. This is a dataset for sentiment classification of movie reviews.
- Enter: movie reviews
- Output: [‘negative’,’positive’]
save_to_diskThe function is used to save the loaded data set to a local directory.
Divide the loaded data set into a train part and a validation part.
import datasets
from datasets import load_dataset

#
DATASET_NAME = "rotten_tomatoes"

#
raw_datasets = load_dataset(DATASET_NAME)

raw_datasets.save_to_disk(os.path.join("D:\\GitHub\\LEARN_LLM\\FineTune\\FineTune1\\data", DATASET_NAME))

#
raw_train_dataset = raw_datasets["train"]

#
raw_valid_dataset = raw_datasets["validation"]
2. Load the model
Here, directly use the from_pretrained function of AutoModelForCausalLM in the transformers library, fill in the pre-trained model name, and then it will automatically load the model online during operation. This article uses the gpt2 model.
from transformers import AutoModelForCausalLM

#
MODEL_NAME = "gpt2"

#
model = AutoModelForCausalLM.from_pretrained(MODEL_NAME, trust_remote_code=True)
3. Load Tokenizer
Through HuggingFace, you can specify the model name and automatically download the corresponding Tokenizer during runtime. Directly use the from_pretrained function of AutoTokenizer in the transformers library and fill in the corresponding model name.
from transformers import AutoTokenizer, AutoModel

# tokenizer
tokenizer = AutoTokenizer.from_pretrained(MODEL_NAME, trust_remote_code=True)
tokenizer.add_special_tokens({'pad_token': '[PAD]'})
tokenizer.pad_token_id = 0
4. Process the training data set
Use functions datasetsin the library mapfor data processing. mapThe function parameters are as follows:
map(
    function: Optional[Callable] = None,
    with_indices: bool = False,
    with_rank: bool = False,
    input_columns: Optional[Union[str, List[str]]] = None,
    batched: bool = False,
    batch_size: Optional[int] = 1000,
    drop_last_batch: bool = False,
    remove_columns: Optional[Union[str, List[str]]] = None,
    keep_in_memory: bool = False,
    load_from_cache_file: bool = True,
    cache_file_names: Optional[Dict[str, Optional[str]]] = None,
    writer_batch_size: Optional[int] = 1000,
    features: Optional[Features] = None,
    disable_nullable: bool = False,
    fn_kwargs: Optional[dict] = None,
    num_proc: Optional[int] = None,
    desc: Optional[str] = None,
)
- This function processes each element in the Dataset through a mapping function. If function is not specified, the default function is lambda x: x.
- The parameter batched indicates whether to perform batch processing
- The parameter batch_size indicates the size of the batch, that is, how many elements are processed each time. The default is 1000.
- The parameter drop_last_batch indicates whether to process the last batch when the quantity of the last batch is less than batch_size.
- remove_columns indicates the name of the column to be deleted. Deleting columns is deleted after the data processing is completed and does not affect the use of the function.
Data processing process code:
#
named_labels = ['neg','pos']

#  token_id
label_ids = [
    tokenizer(named_labels[i],add_special_tokens=False)["input_ids"][0]
    for i in range(len(named_labels))
]

MAX_LEN=32   #
DATA_BODY_KEY = "text" #
DATA_LABEL_KEY = "label" #

# input_ids, attention_mask, labels
def process_fn(examples):
    model_inputs = {
            "input_ids": [],
            "attention_mask": [],
            "labels": [],
        }
    for i in range(len(examples[DATA_BODY_KEY])):
        inputs = tokenizer(examples[DATA_BODY_KEY][i],add_special_tokens=False)
        label = label_ids[examples[DATA_LABEL_KEY][i]]
        input_ids = inputs["input_ids"] + [tokenizer.eos_token_id, label]

        raw_len = len(input_ids)
        input_len = len(inputs["input_ids"]) + 1

        if raw_len >= MAX_LEN:
            input_ids = input_ids[-MAX_LEN:]
            attention_mask = [1] * MAX_LEN
            labels = [-100]*(MAX_LEN - 1) + [label]
        else:
            input_ids = input_ids + [0] * (MAX_LEN - raw_len)
            attention_mask = [1] * raw_len + [tokenizer.pad_token_id] * (MAX_LEN - raw_len)
            labels = [-100]*input_len + [label] + [-100] * (MAX_LEN - raw_len)
        model_inputs["input_ids"].append(input_ids)
        model_inputs["attention_mask"].append(attention_mask)
        model_inputs["labels"].append(labels)
    return model_inputs

#
tokenized_train_dataset = raw_train_dataset.map(
    process_fn,
    batched=True,
    remove_columns=raw_train_dataset.column_names,
    desc="Running tokenizer on train dataset",
)

#
tokenized_valid_dataset = raw_valid_dataset.map(
    process_fn,
    batched=True,
    remove_columns=raw_valid_dataset.column_names,
    desc="Running tokenizer on validation dataset",
)
5. Define data shaper
Automatically split data into batches during training
#
collater = DataCollatorWithPadding(
    tokenizer=tokenizer, return_tensors="pt",
)
6. Define training hyperparameters
LR=2e-5         #
BATCH_SIZE=8    # Batch
INTERVAL=100    #

#
training_args = TrainingArguments(
    output_dir="./output",              # checkpoint
    evaluation_strategy="steps",        #
    overwrite_output_dir=True,
    num_train_epochs=1,                 #
    per_device_train_batch_size=BATCH_SIZE,     #
    gradient_accumulation_steps=1,              #
    per_device_eval_batch_size=BATCH_SIZE,      # evaluation batch size
    logging_steps=INTERVAL,             #
    save_steps=INTERVAL,                #
    learning_rate=LR,                   #
)
- Learning rate : It is a hyperparameter that guides us how to adjust the network weight through the gradient of the loss function, and controls the speed of parameter update by setting the learning rate. In the following formula, when updating parameter w, α is the learning rate.
- Batch Size : refers to the amount of data provided to the model at one time during training. During training, the model needs to train the entire training data set, but the data set is usually very large. If the entire data set is provided to the model for training at one time, it may cause insufficient memory or take too long to calculate. Therefore, we usually divide the data set into several batches, and provide one batch for model training at a time. Batch Size refers to the amount of data in a Batch.
- Number of training epochs : When training a model, the number of training epochs is usually set, which means how many times the model will be trained on the training data set. A larger number of training epochs means that the model will learn the training data set more fully, but it will also increase the training time.
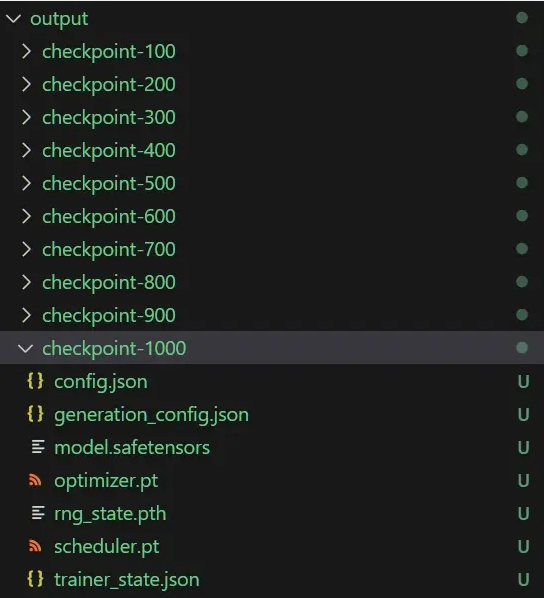
- Checkpoints (CheckPoints) : refers to saving the complete state of the model through periodicity (iteration/time). When the model training fails, you can continue training from the saved checkpoint model to avoid having to start from scratch every time when the training fails. The resulting waste of training time. Checkpoint mode is suitable for scenarios where model training takes a long time, training needs to end early, fine-tune, etc. It can also be extended to scenarios where training is resumed at breakpoints when exceptions occur.
7. Define the trainer
#
model.gradient_checkpointing_enable()

#
trainer = Trainer(
    model=model, #
    args=training_args, #
    data_collator=collater, #
    train_dataset=tokenized_train_dataset,  #
    eval_dataset=tokenized_valid_dataset,   #
    # compute_metrics=compute_metric,         #
)
8. Start training
#
trainer.train()
All dependency packages are as follows:
import datasets
from datasets import load_dataset
from transformers import AutoTokenizer, AutoModel
from transformers import AutoModelForCausalLM
from transformers import TrainingArguments, Seq2SeqTrainingArguments
from transformers import Trainer, Seq2SeqTrainer
import transformers
from transformers import DataCollatorWithPadding
from transformers import TextGenerationPipeline
import torch
import numpy as np
import os, re
from tqdm import tqdm
import torch.nn as nn
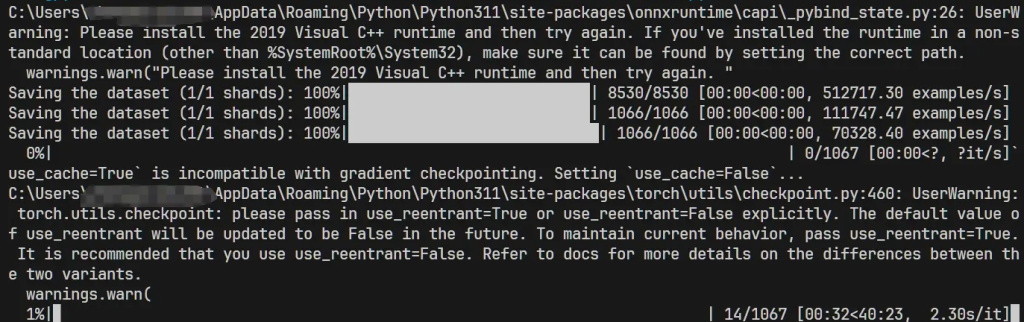
After a successful run, it will look like this, showing the current training progress, estimated time consumption, etc.:
After training:
9. Summary
This article takes the emotion classification data set and gpt2 model on Hugging face as an example to show the training process. At the same time, some interfaces and concepts of the Hugging face training model are briefly introduced. You can run through this example with zero foundation.
To summarize the model training process:
(1) Load the data set
(2) Data preprocessing
- Splice input and output into a specific format
- Text to Token IDs
- Use labels to identify which part is the output (only the output token participates in the loss calculation)
(3) Load model
(4) Load the Tokenizer of the model
(5) Define data organizer
(6) Define training hyperparameters: learning rate, batch size,…
(7) Define trainer
(8) Start training
Through this process, you can run through the model training process.