
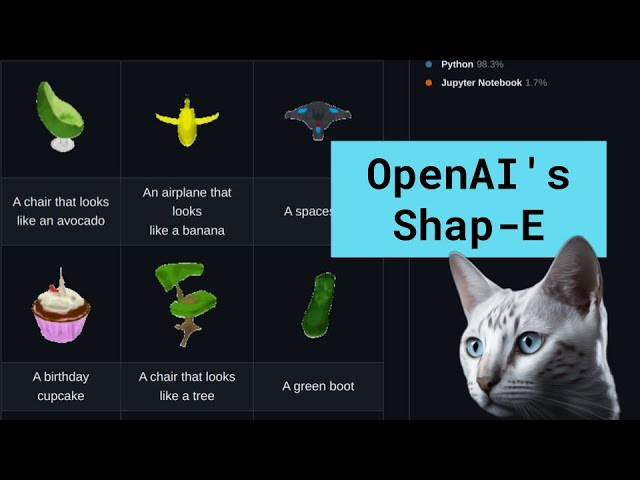
Shap-E is an innovative model developed by OpenAI that can use text or images as input to generate a series of 3D objects, thus changing the field of 3D applications. This remarkable technology is freely accessible on GitHub, and users can run it seamlessly on their own computers, with no OpenAI API key or internet connection required. Shap-E’s versatility is also what sets it apart. Users can open the generated 3D objects in software such as Microsoft Paint 3D, or even convert them into STL files for 3D printing. This technology is redefining how we approach text-to-3D and image-to-3D generation, and what creative possibilities AI applications can generate from it.
In this tutorial, we’ll learn how to create a notebook in Google Colab, set up and generate a 3D model using OpenAI’s Shap-E model, and customize it using Blender Studio.
First, you need to go to blender.org and download Blender Studio that is compatible with your operating system.
Next, go to Google Colab and create a new notebook. !
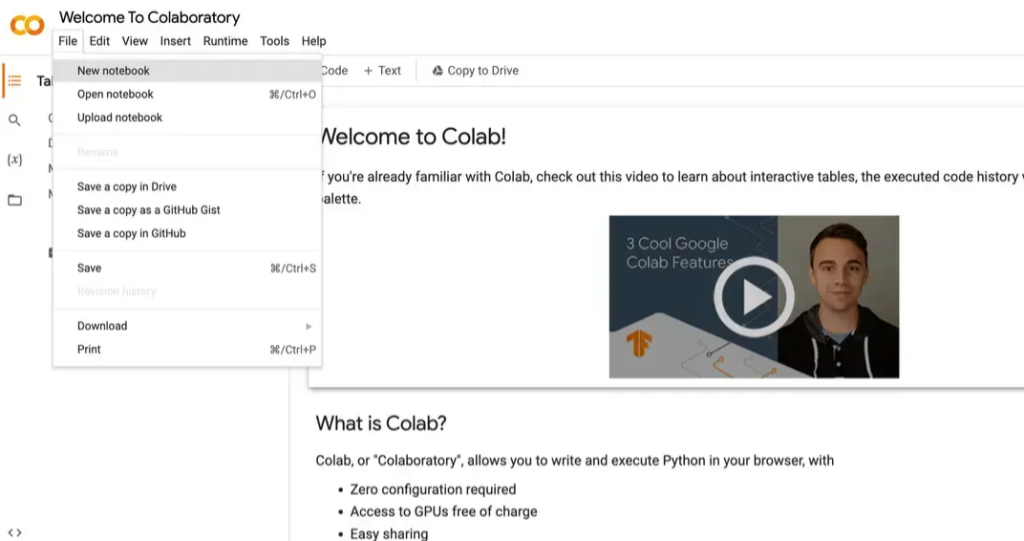
Create a new notebook in Google Colab
Now, we need to clone the Shap-E repository to our Google Colab Notebook.
!git clone https://github.com/openai/shap-e
Go into the directory and install the requirements.
%cd shap-e!pip install -e .
Add new code cell .
Here we will import all necessary libraries.
import torchfrom shap_e.diffusion.sample import sample_latentsfrom shap_e.diffusion.gaussian_diffusion import diffusion_from_configfrom shap_e.models.download import load_model, load_configfrom shap_e.util.notebooks import create_pan_cameras, decode_latent_images, gif_widget
Please click the “Run” button or press the “CMD/CTRL + Enter” keys to run a single block of code.
Now we will set the device to CUDA if available, otherwise to CPU.
device = torch.device('cuda' if torch.cuda.is_available() else 'cpu')
Click Run or CMD/CTRL + Enter .
Add new code cell .
Here we will load the model and weights.
xm = load_model('transmitter', device=device) model = load_model('text300M', device=device) diffusion = diffusion_from_config(load_config('diffusion'))
Please click “Run” or press “CMD/CTRL + Enter” keys.
Please be patient, it will take some time to load the model and weights. For me this took about 5 minutes. However, this depends on your internet connection speed.
Next, we will generate a 3D model.
batch_size = 1 # this is the size of the models, higher values take longer to generate.guidance_scale = 15.0 # this is the scale of the guidance, higher values make the model look more like the prompt.prompt = "a donut" # this is the prompt, you can change this to anything you want.latents = sample_latents(
    batch_size=batch_size,
    model=model,
    diffusion=diffusion,
    guidance_scale=guidance_scale,
    model_kwargs=dict(texts=[prompt] * batch_size),
    progress=True,
    clip_denoised=True,
    use_fp16=True,
    use_karras=True,
    karras_steps=64,
    sigma_min=1E-3,
    sigma_max=160,
    s_churn=0,)
Click Run or CMD/CTRL + Enter .
It takes some time to generate the 3D model, depending on your batch_size higher batch_size will take longer to generate the 3D model. For me, generating the 3D model takes about 22 seconds for batch_size=1 .
Add new code cell .
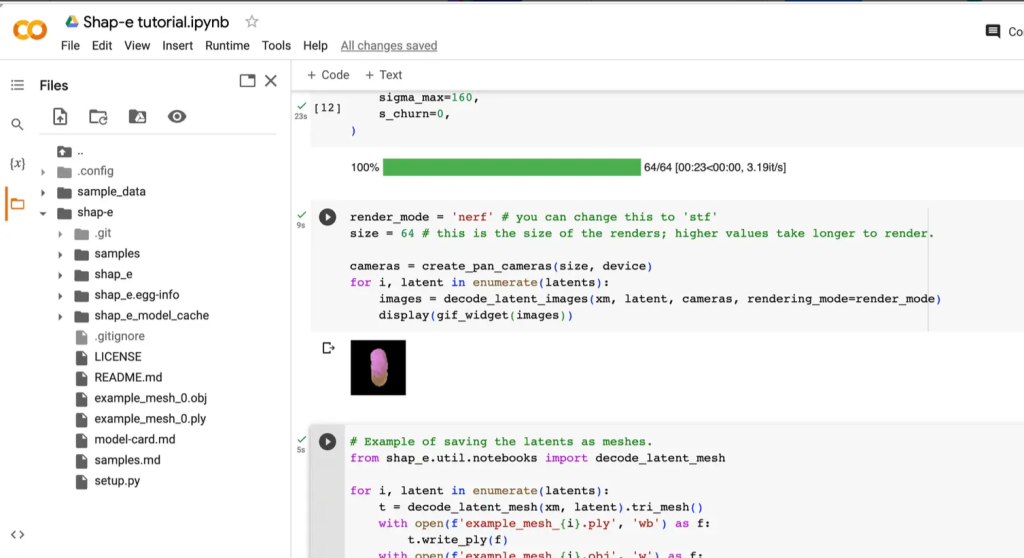
Here we will render the 3D model, using render_mode = ‘nerf’ Neural Radiance Fields (NeRF) to render the 3D model. You can change this to render the 3D model using style transfer function (STF) render_mode = ‘stf’ render mode.
render_mode = 'nerf' # you can change this to 'stf'size = 64 # this is the size of the renders, higher values take longer to render.cameras = create_pan_cameras(size, device)for i, latent in enumerate(latents):
    images = decode_latent_images(xm, latent, cameras, rendering_mode=render_mode)
    display(gif_widget(images))
Please click “Run” or press “CMD/CTRL + Enter” keys.
Do you see the model rotating? Cool, huh?
Next, we will save the 3D model as .ply and .obj files.
Please note: the .obj file will be used later in Blender Studio for customization.
# Example of saving the latents as meshes.from shap_e.util.notebooks import decode_latent_meshfor i, latent in enumerate(latents):
    t = decode_latent_mesh(xm, latent).tri_mesh()
    with open(f'example_mesh_{i}.ply', 'wb') as f: # this is three-dimensional geometric data of model.
        t.write_ply(f)
    with open(f'example_mesh_{i}.obj', 'w') as f: # we will use this file to customize in Blender Studio later.
        t.write_obj(f)
Click Run or CMD/CTRL + Enter .
Switch the tab to Files and hit Refresh. You will see the example_mesh_0.ply and example_mesh_0.obj files.
Google Colab file
Download the .obj file to your local computer.
Open Blender Studio and create a new project.
blender studio
Delete the default cube.
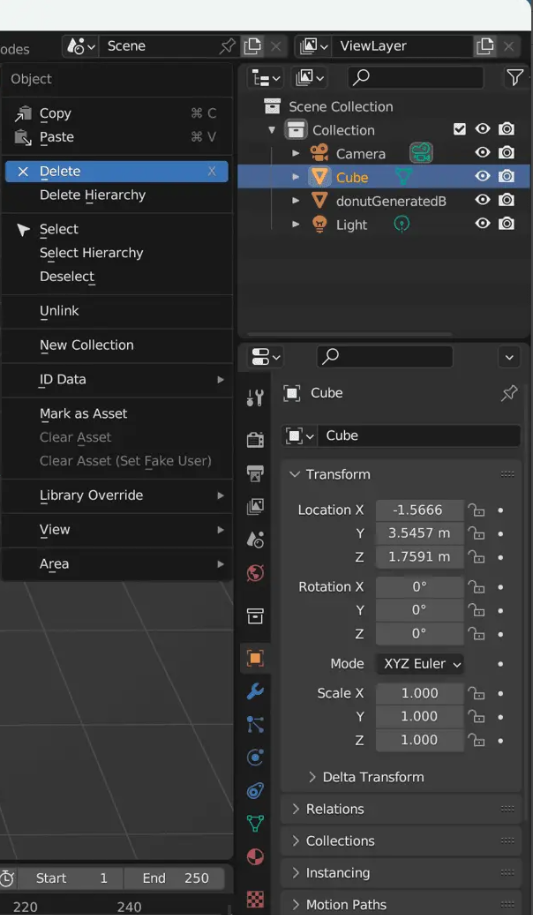
Delete default cube
Click File > Import > Wavefront (.obj) . Select the .obj file you downloaded from Google Colab.
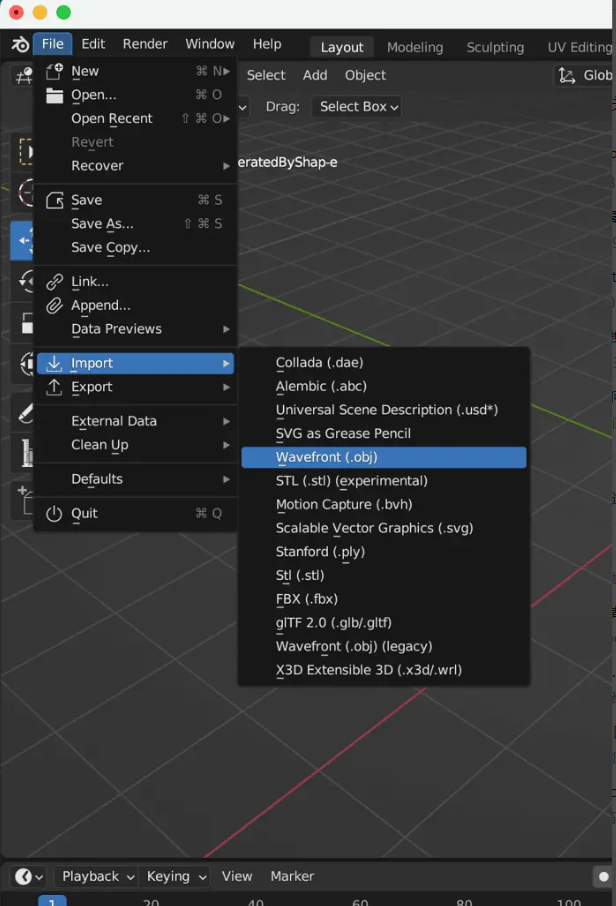
Import .obj file
You should see the 3D model in the center.
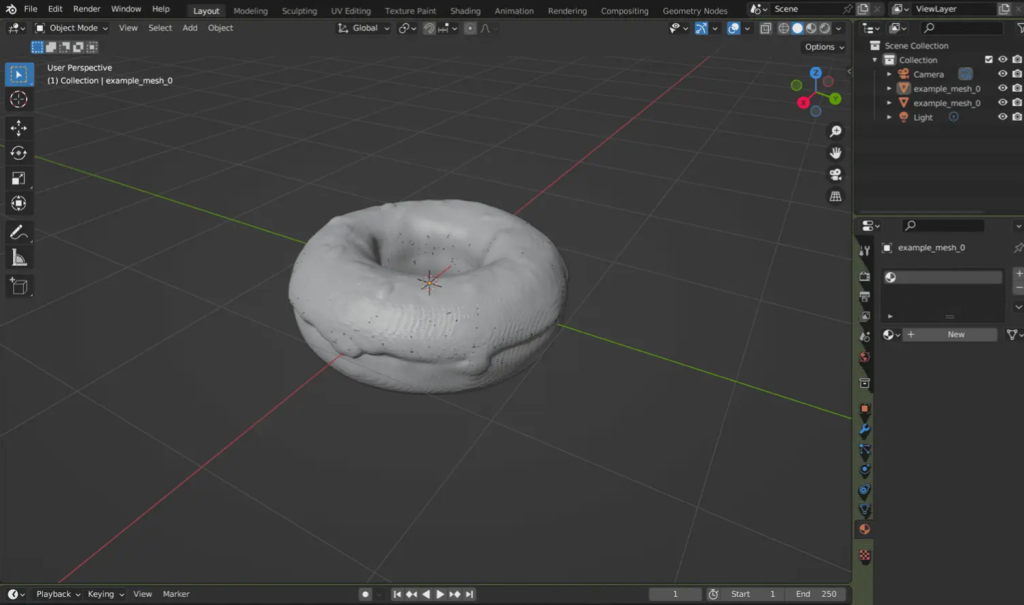
3D model
It looks awesome on its own, and Shap-E did a great job by the way.
You can customize the 3D model according to your needs.
For demonstration purposes, I simply used pink colored toppings and brown donuts.
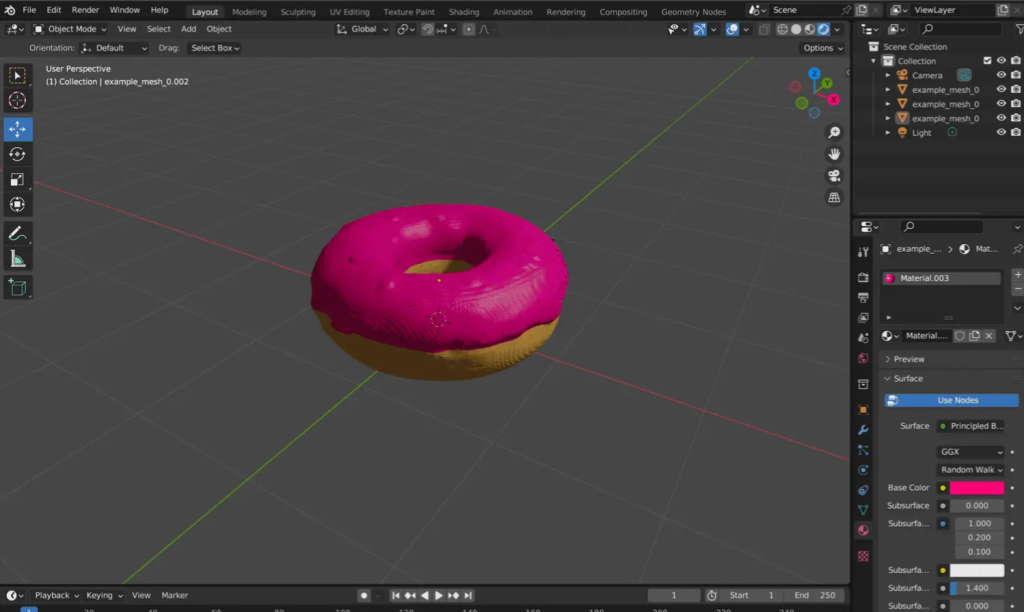
Custom 3D models

Midjourney’s AI generated art
In this tutorial, we learned how to set up and use a Shape-E model using Google Colab. Additionally, we looked into Blender Studio and tried custom generated 3D models.